Valentine’s Day Pink Gradient Stud Glam Nails!

image

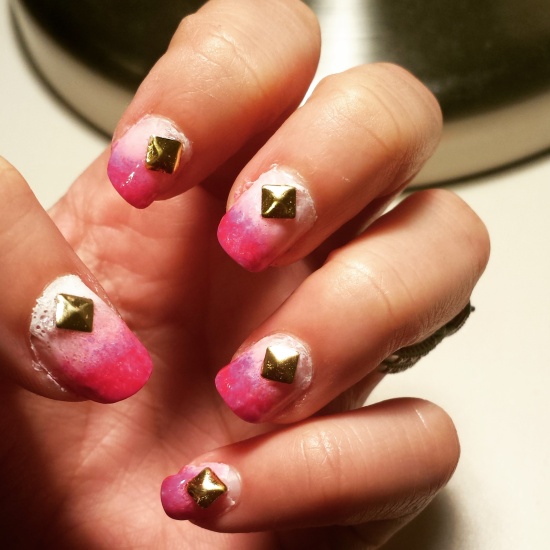
Here’s another design for Valentine’s Day! I didn’t do a video tutorial on this design but it is pretty easy to do! Since many of my nail designs have been purple lately, I decided to do a pink look for Valentine’s Day. To get this gradient effect I used white, light pink and fuchsia nail polishes. Here are the steps on how to get this look:

1. Take a makeup sponge and dab each of your 3 nail polishes in a row.

2. Press the sponge onto your nail a few times to get the gradient look and blended lines.

3. Repeat steps 1 & 2 again for a second coat on each of your nails.

4. Apply a top coat to smooth out the gradient lines even more.

5. While the top coat is still wet, Dip a toothpick in a little bit of clear nail polish and grab a gold stud.

6. Press the gold stud onto your nail, pressing down on it for a few seconds.

7. Finally apply another coat of your top coat to seal in the stud.

And you’re done! It’s pretty simple to do and has a really cool major glam look!

Products Used:
Blanc – Essie
Muchi Muchi – Essie
Fuchsia – LA Colors
Fast Forward Top Coat – China Glaze
Gold Studs – Amazon
Valentine’s Day Corset Nails

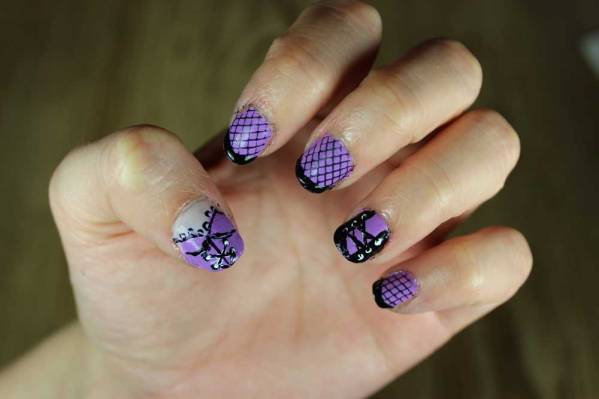
It’s February so it’s time to break out the Valentine’s Day nails! I decided to do some really cute lingerie nails in honor of Valentine’s Day and they turned out to be pretty easy to do! Take a look at my video tutorial below and make sure to subscribe to my YouTube channel to see more videos!

IMG_3940a

Products Used:
Ballet Slippers – EssiePlay Date – Essie
Lacey Lilac – Sally Hansen
Black – LA Colors
White – Unknown

J’adore Paris

image

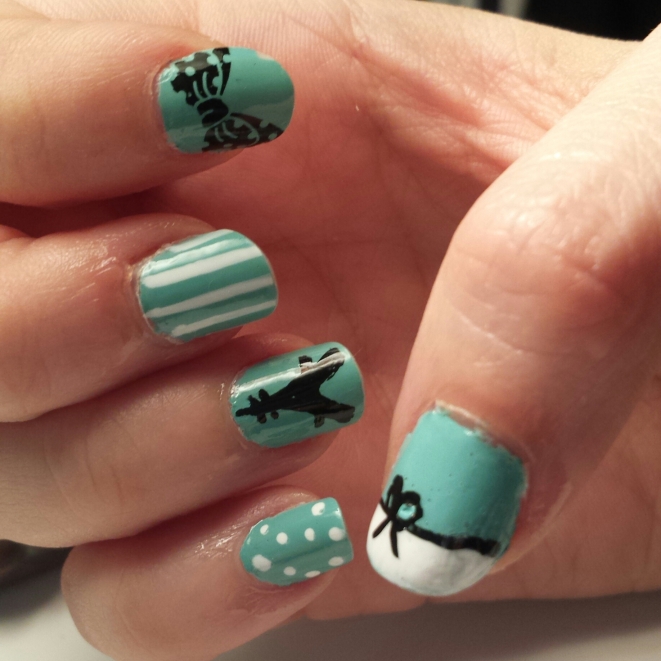
This week’s nails are inspired by the beautiful city of Paris. The Eiffel Tower, cute, classy bows and Tiffany Blue (China Glaze For Audrey)… what more could you ask for? I absolutely love how classy this look is and it’s very easy to do. For the Eiffel Tower, just start with an “A” shape. Then add two short lines going across at the top and a longer line towards the mid section. The bow on my index finger is a Konad stamp and I drew the bow on my thumb with a thin nail art brush. The stripes and polka-dots are easy to do with a thin nail art brush too. I’ve recently been loving stripes and polka-dots together, too – they’re simple and cute. Hope you like!

Happy Easter!

Aspen 3

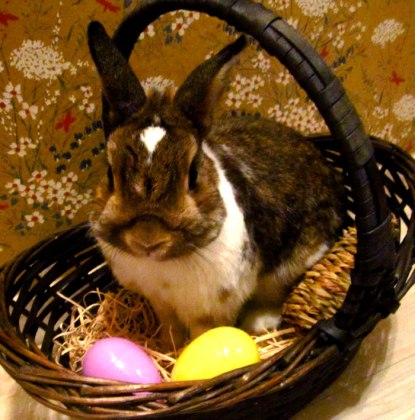
My Easter bunny wishes you and your family a happy Easter! He paid us a visit this morning and he even laid some colored eggs. Now wait a minute… let’s spend a moment reflecting on the absurdity of this statement. Which is the most ridiculous part of this sentence: 1) the fact that a male is laying eggs, 2) a bunny is laying eggs or 3) that said eggs are colored? While I facepalm, please enjoy some cute photos of Aspen’s first Easter!

Aspen 1“What the heck am I sitting in?”

Aspen 2“Is this funny to you?”

Bunny Ring for Spring!

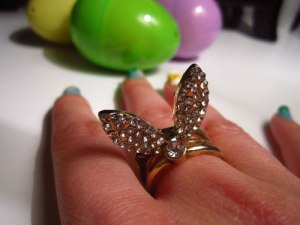
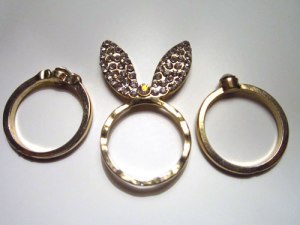
This is my new favorite ring! Isn’t it cute? Perfect for Easter! I got it at Charlotte Russe this passed weekend and when I saw it I knew I had to buy it. The set came with three rings, the bunny ears and two smaller rings to go on either side of it. There are stones covering the bunny ears and single stones on the two side rings. All three rings have a gold finish, which I like a lot.

IMG_1389

IMG_1390

Here’s a better photo of my nails. I should probably try to start using my camera for these photos instead of my phone. It makes a big difference!IMG_1391

I’m ready for my closeup!

My bun hasn’t been properly introduced yet. Here’s Aspen sniffin the camera and saying “I’m ready for my closeup!”

IMG_1400